I came up with this project for a demonstrator newsletter that I was being showcased in 2008. I call it my Spooky Tree Display and scrapbook page. I have had more requests for this tutorial than any other that I have ever provided! So back by popular demand…
This piece is a dual purpose piece. Use it as the display before and for Halloween and use it for a scrapbook page after the holiday! How’s that for being creative?!

Preparation:
Print out provided tree form template. Click here for the template.
Choose the images you wish to appear in the windows (if at all) whether
they are rub-ons or stamps.

Cut out tree form template with either Hobby Blade or Paper Snips. Then trace with pencil onto a piece of Basic Black card stock.
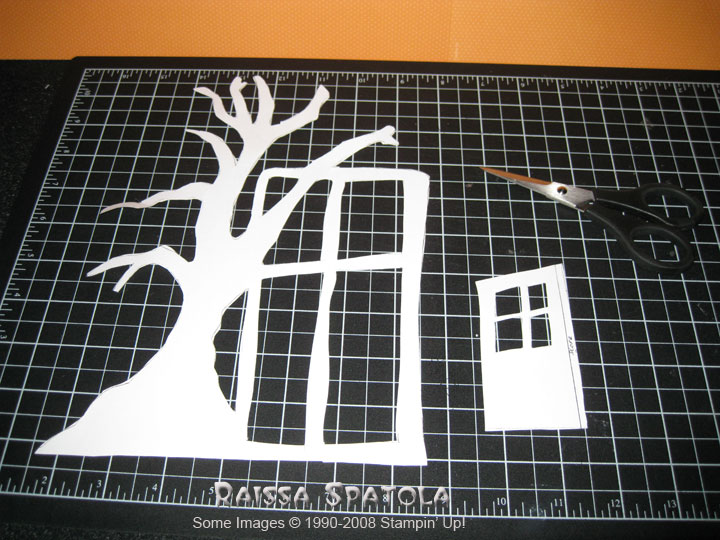
Using your Paper Snips cut out the tree form following your pencil marks. Don’t worry if you don’t cut exactly on the lines, bumps will add character to the design and make yours unique!

Take a piece of the White Vellum paper, lay it under your cut out window pane. Trace with pencil the outlines of the window areas. This will help you position the rub-ons and stamps correctly. Set the tree form aside.
Cut the vellum a bit smaller than the window panes.

Choose the rub-ons and or stamp sets you wish to fill up your windows If you choose rub-ons cut out all the images you wish to use.
Position your rub-ons, and or stamp the images with Stazon in the windows. Set aside.

Be sure window art is dry. Then adhere the vellum image side up to the back of the tree form window frame using Dotto, to easily reposition, if needed. Set aside.

Ink up the Frightful Fence wheel using VersaMark. Roll wheel across the Basic Black Card stock. Set aside to dry.
Using a Hobby Blade cut out the Frightful Fence following your VersaMarked image as a guide. The gate will lay against tree stand.

Cut a slit from the base of the tree trunk up an inch and a half.
From the scraps cut a strip of Basic Black Card stock 1.5” x 5.75” for your stand.
Optional:
Add door to front of window (so window is shadow of door).
Score 1/8” in by hinge and adhere with mono adhesive to window frame in the lower right corner.
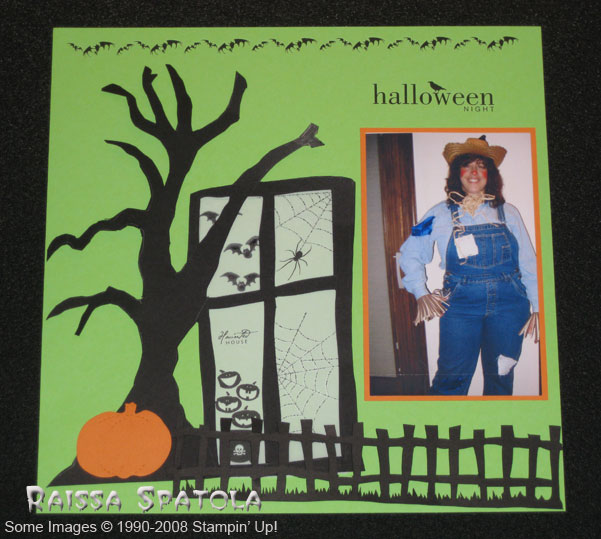
After Halloween you could use it as a component of a scrapbook page.
• Use Big Shot and Pumpkin #4 for the Pumpkin on base of tree.
• Embellish with text and your own pictures.
• Enlarge the template making the window panes larger and display Halloween pictures inside
Supplies
Pencil
Basic Black Card Stock
8.5 x 11” 2 pieces
Gable Green Card Stock (now retired)
12 x 12” 1 piece
White Vellum Paper 1 piece
Pumpkin Pie Card Stock
8.5 x 11” 1 piece
Chills & Thrills Rub-ons (now retired)
Halloween Frights
Frightful Fence Wheel
Jumbo Wheel Handle
Stazon Jet Black Ink
VersaMark
Hobby Blade
Paper Snips
Dotto
Optional:
Big Shot, Pumpkin #4 die
Votive candle holder & votive candle (In the example I used a red votive)


Leave a Reply